· Rob Boyle · Rules · 3 min read
Zones
One of our aims with conflict in The Snarl was to have a system that was largely theater-of-the-mind but that still had robust tactical elements. To this end we adopted a zone-based combat system, with some specific twists.

One of our aims with conflict in The Snarl was to have a system that was largely theater-of-the-mind but that still had robust tactical elements. To this end we adopted a zone-based combat system, with some specific twists.
There are three zones for combat: Engaged, Skirmish, and Ranged. The zone you’re in has specific impacts on your actions on your turn.
In the Engaged zone, you are toe-to-toe with one or more opponents, slugging it out within a specific melee cluster. The advantage here is that you go first in Initiative order and you can make Intercept moves (opportunity attacks) against enemies that move away from you. The drawbacks are that you can only melee attack someone you are engaged with, your ranged attacks are more difficult, and anyone outside the Engaged zone gets a bonus against you, since you are focused on your immediate fight. Some specific moves/abilities require you to be engaged with an opponent to pull them off.

In the Skirmish zone, you are always in motion, dancing around the fight, lunging in to make attacks and sliding back out to safety. You can make melee attacks against anyone in the Engaged or Skirmish zones, and you can also make ranged attacks without penalty. However, you must spend 1 of your actions taking a Skirmish move, representing you staying mobile to a void danger (every character has 3 actions to spend on their turn). If you fail to do so, you acquire a jolt (a type of metacurrency that can be used against you—we’ll explain these in a future post), because you’re a sitting duck.
In the Ranged zone, you are safe from melee attacks and you can make ranged attacks against any targets. You are also in an easier position to flee the fight. However, you cannot melee unless you switch zones.
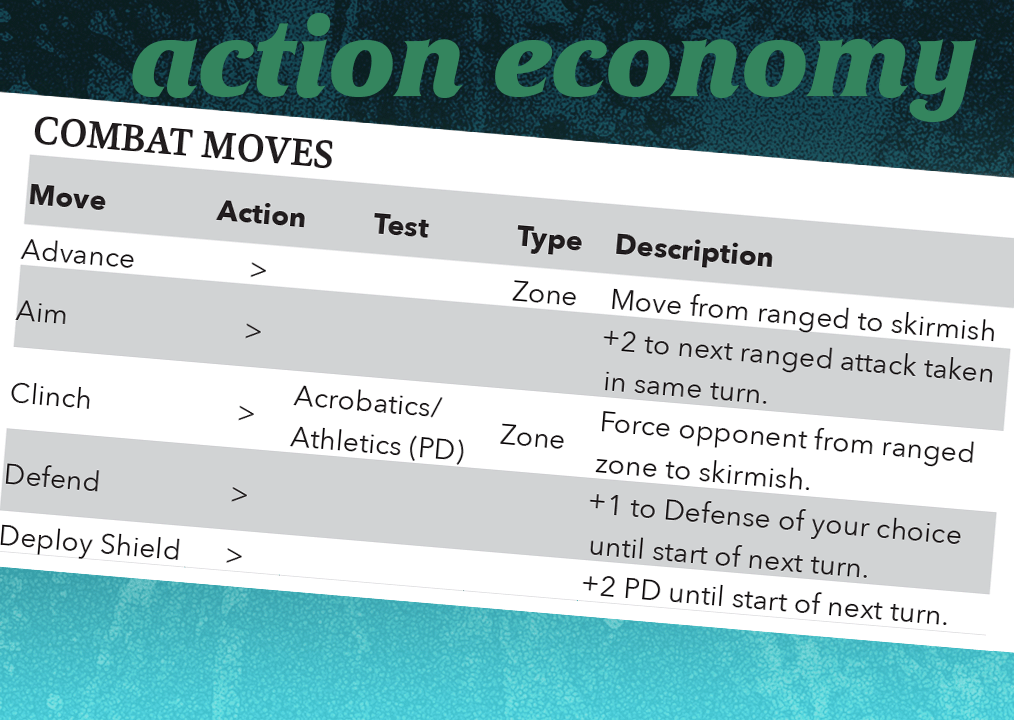
Naturally, there are various moves that govern switching between zones — or forcing an opponent to switch zones. For example, from Skirmish you can make a Clinch move to try and draw a Ranged opponent into the Skirmish zone.
The zone map shown above breaks down the different zones with a quick summation of their impacts. We included Skirmish & Ranged twice so that you can keep the PCs and NPCs on opposite sides, for easier tracking.
There are some other aspects that make the combat system in The Snarl unique that that we’ll get into in future posts — specifically, the jolt system and environmental aspects. Stay tuned!